
Fadé Adeniyi
Tuesday 3 November 2026
The five slash commands behind my video effects, written out in full, plus the one-time setup that makes them work.
They aren't built into Claude. Each one is a custom slash command: a short Markdown file in your project's .claude/commands folder that tells Claude Code what to build. Claude Code then writes the effect in Remotion, a React video framework that's free for individuals. When an effect needs it, rembg cuts you out of the frame.
Type /tier-list S: Claude, A: ChatGPT and Claude Code reads tier-list.md, puts whatever you typed after the command where the file says $ARGUMENTS and does the job (Claude Code docs).
npx create-video@latest

npx -y skills@latest add remotion-dev/skills

pip install "rembg[cpu,cli]"

brew install ffmpeg

mkdir -p .claude/commands
The trap is asking Claude for a cool effect every time. You'll get a different one each time and spend the session describing it again. Write the layout, timing and layers down once and Claude starts from the same brief every time.
The 5 commands
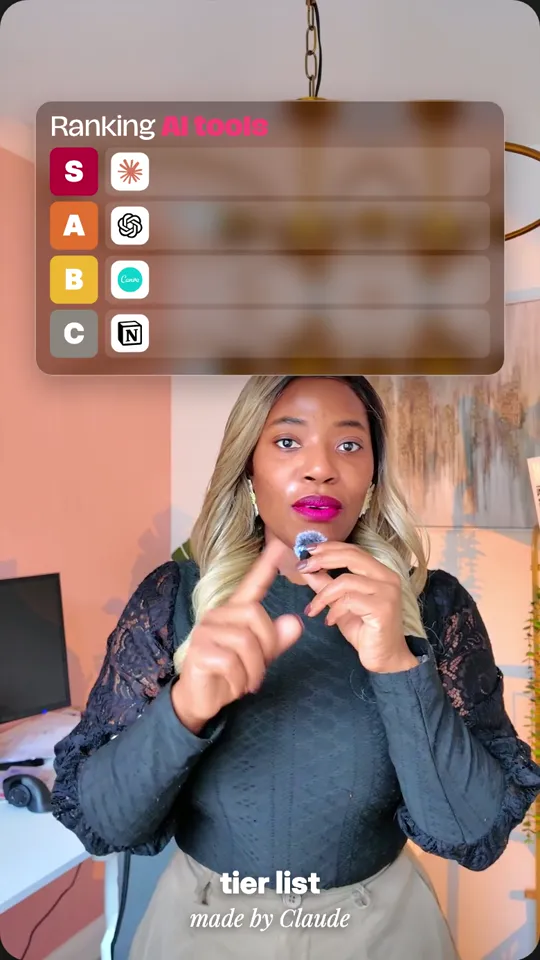
1. /tier-list puts a frosted-glass S, A, B and C board above your head and drops real logos into each row. Example: /tier-list S: Claude, A: ChatGPT, B: Canva, C: Notion.
---
description: Add a frosted-glass tier list of tool logos above my head
argument-hint: [S: tool, A: tool, B: tool, C: tool]
---

Add a tier list to my talking-head video in this Remotion project. The tiers and tools are: $ARGUMENTS

LAYOUT: one frosted-glass card across the top of the 1080x1920 frame, above my head, with a title line such as "Ranking AI tools". Four rows: a square letter tile for S, A, B and C (crimson, orange, yellow and grey) and a strip beside it for the logos.

GLASS: dark see-through fill, backdrop blur of about 22px, a thin white border at about 40% opacity and a soft shadow.

LOGOS: the real logo for each tool on a white rounded tile, from simple-icons or the tool's official SVG. Never draw a logo yourself.

TIMING: the card springs down into place in about half a second. Then the logos drop into their rows one after another, about 0.4 seconds apart, each with a small spin and scale-up as it lands.

Keep my face clear. Render a still for me to check before you render the video.
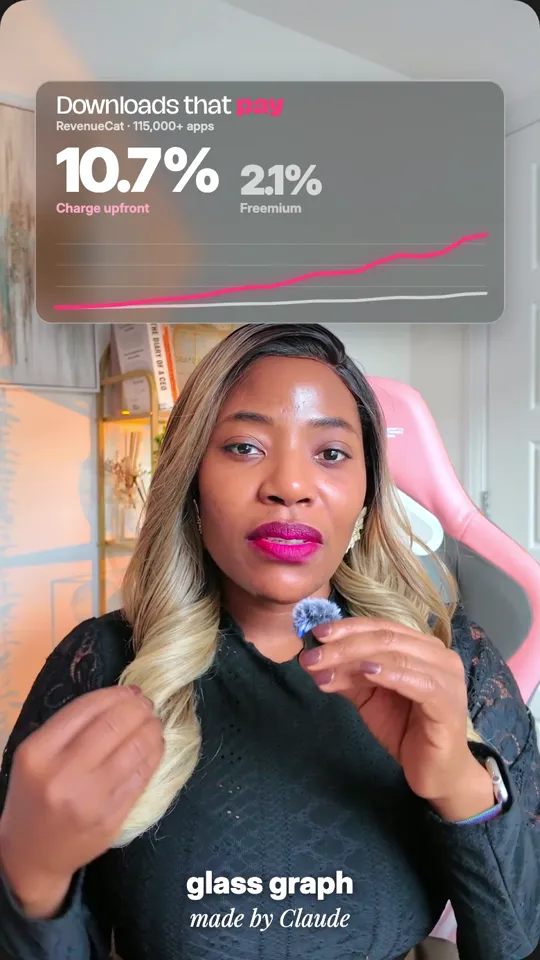
2. /glass-graph shows a stat on a glass card with the number counting up and a line rising under it. In my reel, with RevenueCat's figures: /glass-graph 10.7% charge upfront, 2.1% freemium, RevenueCat, 115,000+ apps.
---
description: Add a frosted-glass stat card with a number counting up and a rising line
argument-hint: [main stat and label] [comparison stat and label] [source]
---

Add a glass stat card to my talking-head video in this Remotion project. The numbers and the source are: $ARGUMENTS

LAYOUT: a frosted-glass card across the top of the 1080x1920 frame, above my head. A short title, the source in small text under it, the main number very large with its label underneath, the comparison number smaller and dimmer to its right and a line chart under both.

ANIMATION: the card springs in. The main number counts up from 0 over about a second while its line draws left to right, rising, in my accent colour with a soft glow. Then the comparison number counts up and its flatter line draws in white.

Use only the numbers I gave you and put the source on the card. Render a still for me to check before you render the video.
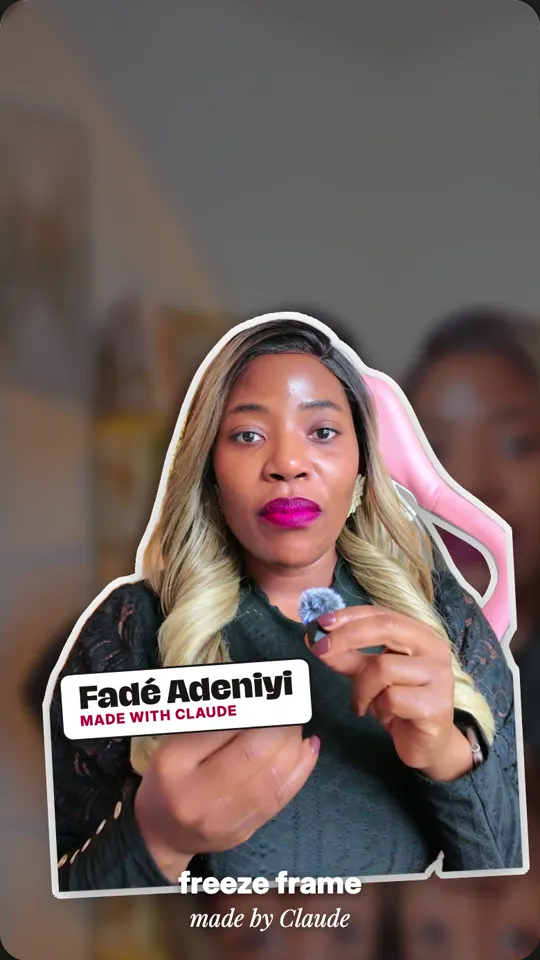
3. /freeze-frame stops on one frame and turns you into a white-outlined sticker with a name tag. The outline is 16 white copies of your cut-out in a ring, with the real cut-out on top. Example: /freeze-frame 17 Fadé Adeniyi MADE WITH CLAUDE.
---
description: Freeze me as a white-outlined sticker cut-out with a name tag
argument-hint: [second to freeze] [name] [line under the name]
---

Add a freeze-frame sticker moment to my talking-head video in this Remotion project. The details are: $ARGUMENTS

CUT-OUT: take the frame at the second I gave you and cut me out of it with rembg using the u2net_human_seg model. Save it as a transparent PNG in public/. If rembg isn't installed, give me the install command and stop.

THE FREEZE: keep the video playing underneath, darkened and blurred. On top, show the frozen cut-out as a sticker. Make the white outline by placing 16 copies of the cut-out, turned solid white, in a ring about 16px out from the original, then draw the real cut-out on top with a soft drop shadow. As it lifts, shrink it slightly and tilt it about 3 degrees.

NAME TAG: a white label with a dark border near my chest, tilted a few degrees, popping in just after the freeze. My name in bold, with one small line under it in my accent colour.

Hold it for about two seconds, then render a still for me to check.
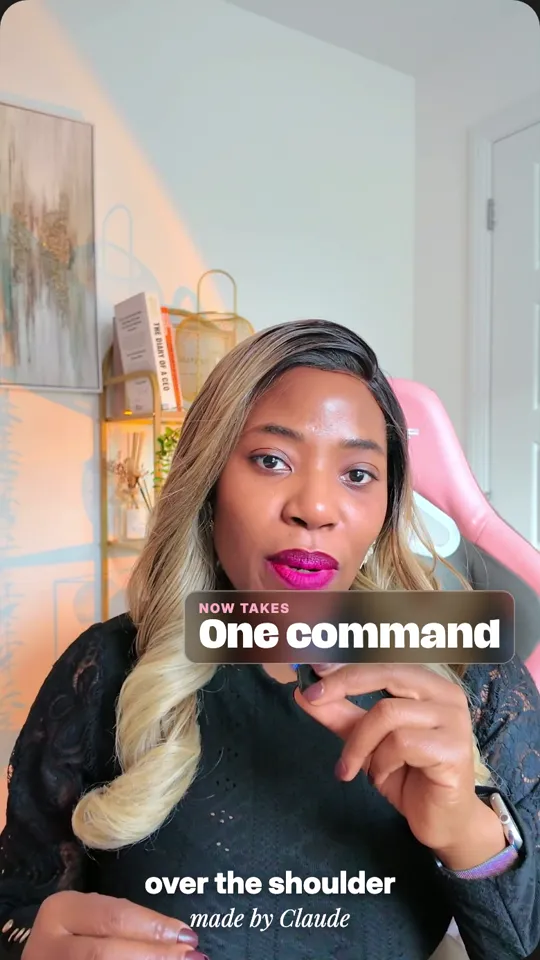
4. /over-the-shoulder pops glass panels in beside you, one side then the other. Example: /over-the-shoulder USED TO TAKE: Hours, NOW TAKES: One command.
---
description: Pop frosted-glass text panels in beside me
argument-hint: [label 1: words 1] [label 2: words 2]
---

Add two frosted-glass text panels beside me in my talking-head video in this Remotion project. The text is: $ARGUMENTS

LAYOUT: the panels sit at shoulder height, about 60% of the way down the 1080x1920 frame. Panel one on the left edge, panel two on the right. Each has a small uppercase label in pink and the main words large and bold in white.

GLASS: the same frosted glass as my other cards: dark see-through fill, backdrop blur of about 22px, a thin white border and a soft shadow.

TIMING: panel one slides in from the left and scales up in about a quarter of a second. About 1.2 seconds later, panel two slides in from the right and panel one fades out. Never cover my face.

Render a still with both panels on screen for me to check.
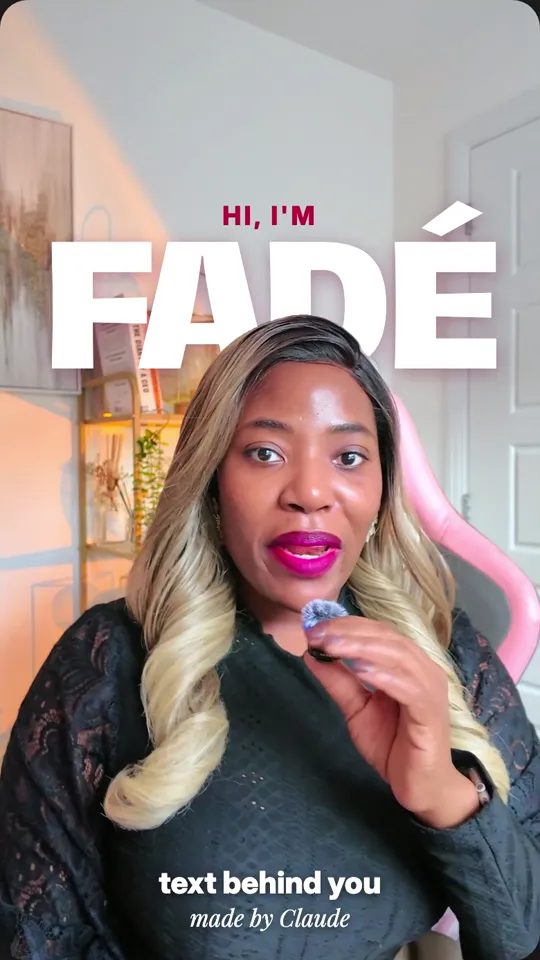
5. /text-behind puts a giant word behind you. It's three layers: your video, the word, then a cut-out of you for every single frame drawn on top. The cut-out is what makes your hair sit in front of the letters. Example: /text-behind FADÉ 8 11.
---
description: Put a giant word behind my head
argument-hint: [word] [start second] [end second]
---

Put a giant word behind me in my talking-head video in this Remotion project. The word and timing are: $ARGUMENTS

CUT-OUTS: extract every frame of that part of the video with ffmpeg, then cut me out of each frame with rembg using the u2net_human_seg model. Save them as numbered transparent PNGs in public/matte/. If rembg isn't installed, give me the install command and stop.

LAYERS, from the bottom up:
1. My video.
2. The word, huge, bold and white, centred at head height, with a small line above it in my accent colour (for example "HI, I'M").
3. The cut-out PNG for the current frame, drawn exactly over the video, so my head and hair sit in front of the word.

ANIMATION: the word rises and scales down into place in about half a second.

Check each cut-out lines up with its frame, then render a still for me to check.
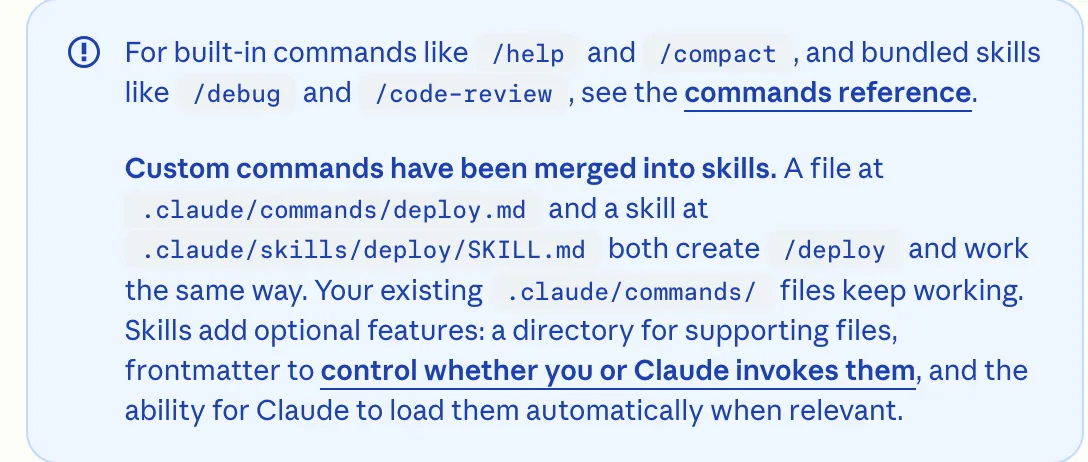
Anthropic's docs say custom commands are now part of skills. A file at .claude/commands/text-behind.md and one at .claude/skills/text-behind/SKILL.md both give you /text-behind and your command files keep working. Skills add extras, such as a folder for supporting files (Extend Claude with skills).
Start with /over-the-shoulder, because it needs no cut-outs. Once that works, install rembg and try /text-behind on a short clip. Every command renders a still first, so check it before you spend time on a full render.
How I use it. I edit my reels with Claude Code, Remotion and rembg. Every effect in this reel was built that way on my own talking-head take, from the tier list above my head to my name behind it. Writing each one up as a command means the next time a reel needs it, I type one line instead of explaining the effect from scratch.
What this won't do: Claude writes different code each time, so expect to nudge a position or a timing. Cut-outs take a while on a long clip and rembg can miss stray hair. Claude Code needs a paid Claude plan and Remotion is free for individuals and small companies, while bigger companies need a licence (Remotion licence).
Describe the effect once. Type one line every time after.
Sources, opened 3 November 2026: Claude Code Docs, Extend Claude with skills and Desktop quickstart; Remotion docs and licence; rembg (MIT licence); RevenueCat, State of Subscription Apps 2026 benchmarks. RevenueCat's article calls the 10.7% and 2.1% figures trial-to-paid in its text and download-to-paid on its chart.
The Audacity to Build is my community for people doing exactly that. It is opening soon. Join the waitlist and you are first in when it does.
If this was useful, follow me. I share what I am actually building, the tools that survive my own testing, and the ones I quietly cancel. New plays every week.
Pop in your name and email and the guide is yours, along with the occasional new guide when I publish one. No spam, ever.